
How to Teach Balancing Chemical Equations Visually

“Why do we need to do this?” is what students ask when you show them how to balance equations for the first time.
They see “stuff” on the right side and “stuff” on the left side and assume it’s balanced. After all, its a lot of work to count each molecule.
But, if you show them through illustrations why they must balance, they will cooperate a lot better. And not turn into three year old’s asking, “Why?” all the time.
The first thing they need to understand is coefficients and subscripts.

Show the Difference in Coefficients and Subscripts
When you start predicting products, your students might want to use subscripts to balance instead of coefficients. So, the best way to prevent this is to show them the difference in subscripts vs. coefficients. (And for the love of atoms have them copy this down.)
This visual has helped so many of my students. So much that I decided to include a similar one in the Balancing Equation Doodle Notes set.
Here we have the subscript 2 illustrated on the left. There are 2 potassiums in each molecule.
On the right, the 3 coefficient is represented by the 3 molecules.
Remind students that superscripts are placed based on the charges within the molecule. They can’t change them to balance the atoms.
Once that is clear, students need a series of examples that teach themlllllllllllllllllllllllllll

Start with Synthesis
Ask students if the equation is balanced.
You may need to specifically ask students if there are the same number of each type of atom on the reactant side as the product side. They should say, “Yes.”
Be sure to ask them how they know. You should hear various explanations about the same number of hydrogens or nitrogens being on both sides.
That first example is easy and gets the students comfortable with the idea of balancing. Calm students are easier to work with than panicked cats who are about to get a bath nervous students.
Now show them how to work a problem that isn’t balanced.

Show a Simple Unbalanced Equation
The next problem you give them should be an unbalanced equation. Ask your students if it is balanced or not. Draw the problem out on the board with one marker color representing each atom. (The purpose of the colors is to help them count atoms correctly.)
Students will recognize that there isn’t the same number of atoms on both sides. Ask them how to fix it. This is where drawing it out really helps students.

Always start by asking students if the equation is balanced. Then ask students what needs to be balanced in that equation. Once they have identified what needs to be balanced, ask them how they will balance those atoms.
In this case they should balance the ammonia with a 2 in front of NH₃.
Then ask them if the problem is balanced. They should tell you “No.”. Then start the process again by asking students what needs to be balanced.

This time they should tell you the hydrogens. Students should add a 3 coefficient in front of H₂.
This time when you ask them if it is balanced they should say, “Yes.”
By asking students if the equation is balanced, you are training them to ask these questions to themselves when you aren’t around. This helps them verify when the problem is done.

Let Students Decide What Problem is Next
Ask them if they want another problem that is the same difficultly level or more difficult. This allows students to evaluate themselves. It also increases buy in for students. They start thinking through how well they understood the problem or if they got stuck.
It also helps students take ownership of their education. And when students do that, teaching chemistry is a dream job.
When students are ready for the next level of difficulty, what should you show them?

Make Balancing Equations A Little Harder
This reaction is great practice because students will need to balance in multiple steps.
Start by asking students if the equation is balanced. They should say, “No.” Then, ask students what needs to be balanced.
They should say, “Bromines.”
Once they have identified the bromines, ask them how they will balance those atoms.

Here they should balance the reactant side bromines with a 2 in front of KBr on the product side.

After that ask if the problem is balanced. They should tell you, “No.” Then start the process again by asking students, “What needs to be balanced?”.

This time they should tell you the potassiums. Then ask them what they will do to balance the potassiums.
Students should add a 2 coefficient in front of the reactant side potassium.
This time when you ask them if it is balanced they should say, “Yes.”

By asking students if the equation is balanced, you are training them to ask these questions to themselves when you aren’t around.

Again, ask students if they’d like another problem like this. Or see if they would like to move on to the next level of problems.
When they are ready to move on, what should you show them?

A Beautiful Double Replacement Reaction
A double replacement reaction is a little harder for students because there is more going on and the atoms are harder to count.
Ask students if this equation is balanced. They should say, “No.” Ask them how to fix it.

They should respond to put a 2 in front of KCl. Then have students see if it is balanced again.

They should say “Yes.”
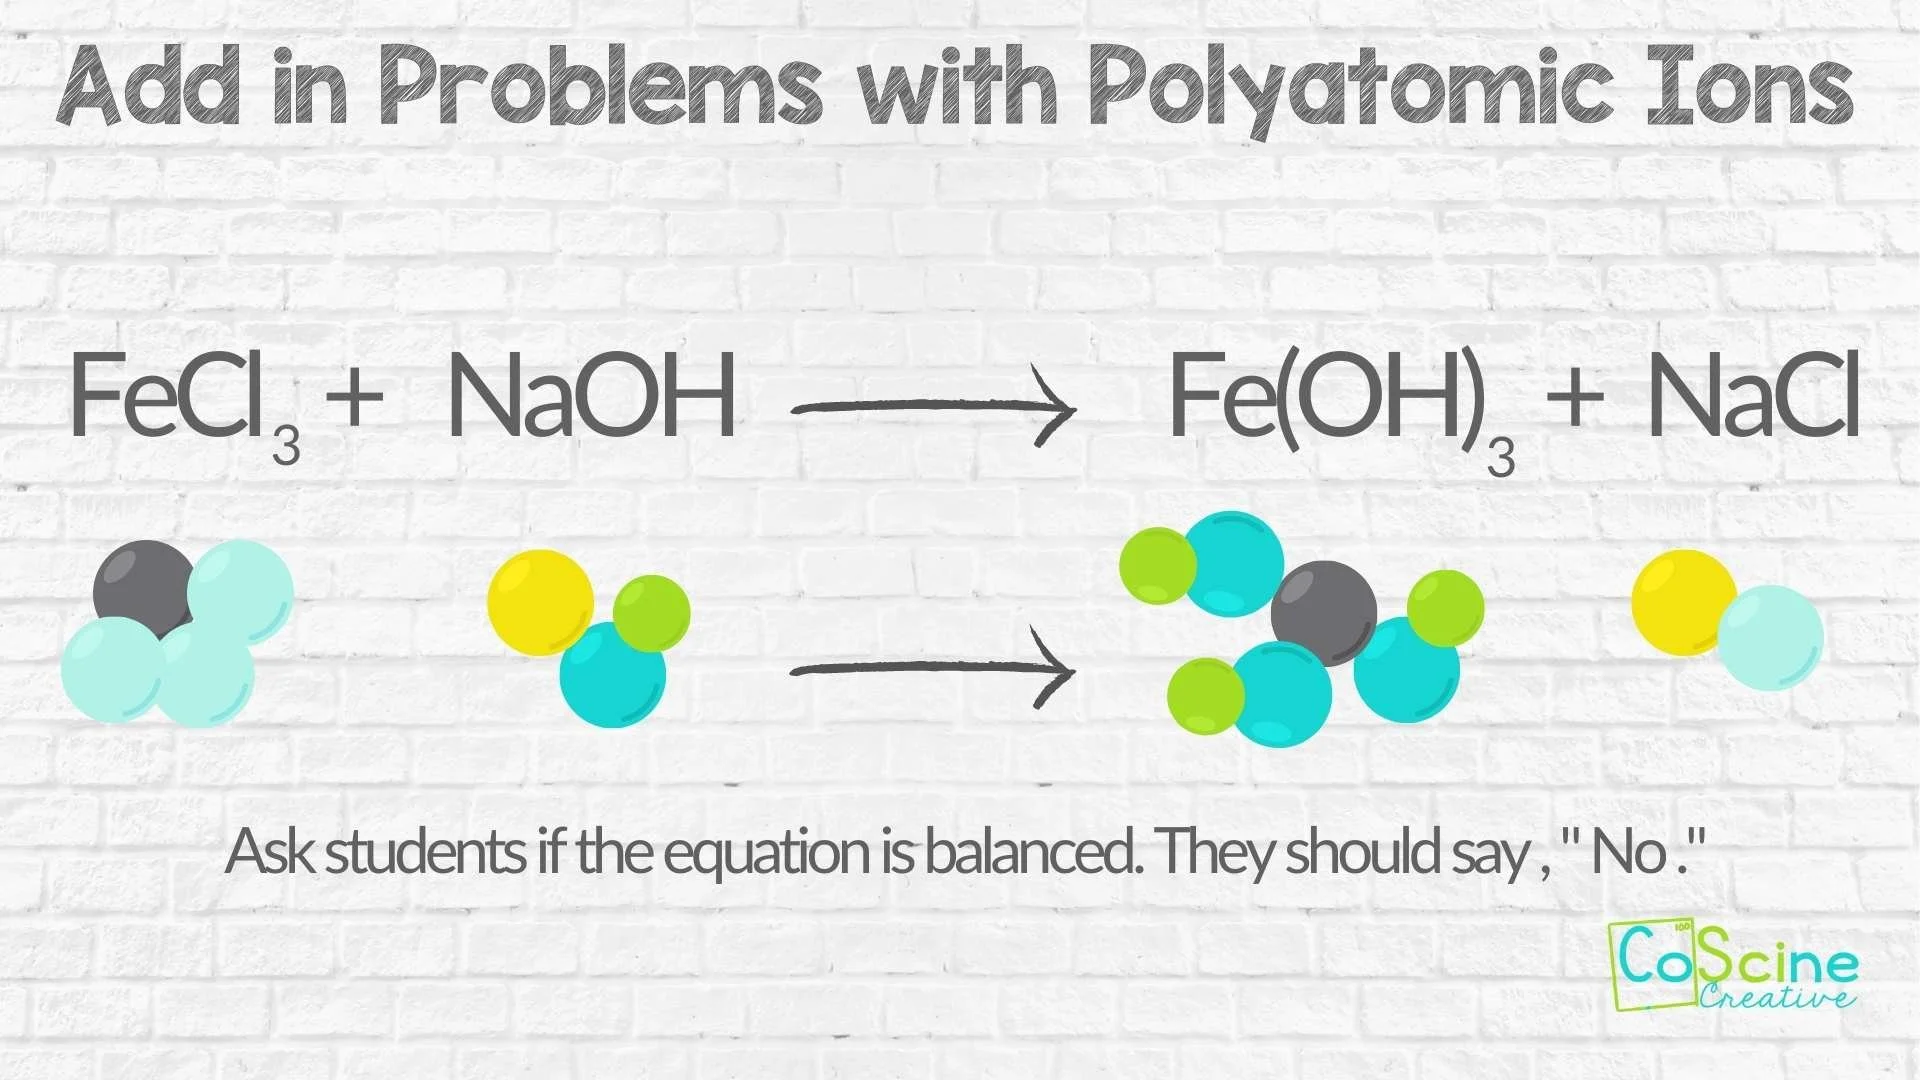
Add in Problems with Polyatomic Ions
When polyatomic ions get thrown into the reaction students want to quit because it looks harder than it is.
But drawing it out like above helps calm students’ nerves.

Ask students if the hydroxides are balanced. They should tell you, “No.”. Then ask them to fix the hydroxides.
Explain to them that there are 3 hydroxides on the product side, so there needs to be 3 on the reactant side.
Students should tell you to add a 3 on the left side.

Ask students if the equation is balanced. They should tell you, “No.”. Then ask them to fix the equation.
Using the color coding, it’s easy for students to see sodium needs a 3 on the product side.

After students have added the 3, ask them if the equation is balanced. They should say, “Yes.”.
But you really like the idea.

You can find the worksheet, or doodle notes in my store. Teachers love this worksheet because it guides students to balance equations on their own.
In the worksheet students start out having each equation drawn out for them, but by the end of the worksheet, students are drawing and balancing the equations on their own.
Which is the whole goal, right?